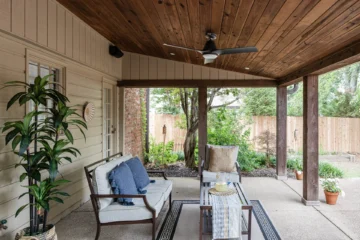
A drafty house is not just uncomfortable; it is expensive. Every gap around a window, door, pipe, or attic hatch lets heated air escape in winter and hot air in during summer, forcing your heating and cooling system to work harder for the same comfort. In many older homes, air leaks account for a large share of total energy loss, and the worst part is that most of them are invisible. Weatherproofing is the practical, low-cost answer: a set of sealing and insulating techniques that close those gaps without major renovation.
The direct answer is that effective weatherproofing starts with finding the drafts, then sealing windows and doors with weatherstripping and caulk, blocking gaps around pipes, vents, and outlets, insulating the attic hatch and rim joists, and adding window treatments that slow heat loss through glass. Done in that order, the work is mostly DIY-friendly, costs far less than new windows or a new heating system, and can make a noticeable difference to comfort and energy bills within a single weekend.
How Drafts Steal Heat From Your Home
A draft is uncontrolled air moving through a gap in the building envelope, and it steals heat in two ways. First, warm air escapes directly through the gap, carrying its heat outside. Second, cold air enters to replace it, cooling the room and creating the chilly breeze you feel near windows and doors. Because warm air rises, leaks near the top of the house, such as the attic hatch and ceiling penetrations, tend to pull the most air out, while leaks near the bottom let cold air in. This chimney-like movement is known as the stack effect, and it runs all winter long.
Common leak points are surprisingly consistent from house to house. Windows and doors account for a large share, but gaps around plumbing and wiring penetrations, recessed lights, electrical outlets on exterior walls, the attic hatch, and the joint where the wall meets the foundation are often just as leaky. A single 3-millimetre gap around a door can admit as much cold air as a small window left partly open. Finding and sealing the biggest leaks first gives the best return, so detection should always come before buying materials.
How Do You Find Drafts Before Spending a Penny?
Start with your hands on a cold, windy day. Wet the back of your hand and move it slowly along window edges, door frames, skirting boards, and outlet covers; even a slight draught will feel cold against damp skin. Look for daylight showing around a closed door, cobwebs or dust marks near gaps, and rattling windows, all of which point to air movement. A lit incense stick or a smoke pen works the same way: hold it near a suspect joint and watch whether the smoke drifts sideways instead of rising straight up.
For a more thorough check, hire or borrow a thermal camera, which shows cold spots on walls and around frames as blue or purple patches. Many energy suppliers offer a subsidised home energy audit that includes a blower-door test, which measures exactly how much air your home leaks and ranks the worst areas. Keep a simple list of every leak you find, grouped by room, so you can buy the right materials in one trip and work through the house methodically instead of sealing at random.
Weatherstripping Windows That Still Need to Open
Windows need a seal that blocks air but still lets the window open, and weatherstripping is made for exactly that job. Self-adhesive foam tape is the easiest option: clean the frame, cut the strip to length, and press it into the top, bottom, and sides of the sash. It suits gaps of roughly 3 to 6 millimetres and lasts one to five years depending on quality and exposure. V-strip, also called tension seal, is a folded plastic or metal strip that presses against the sash and works well in the side channels of double-hung and sliding windows.
For larger or uneven gaps, tubular rubber or vinyl weatherstripping gives a longer-lasting seal, while felt strips suit older windows with irregular frames. Always apply weatherstripping to a clean, dry surface, and do it on a mild day so adhesives bond properly. Check the window still locks easily afterwards, because locking the sash pulls the two halves together and closes the gap further. Replace weatherstripping when it feels flat, cracked, or no longer springs back, since worn strips can leak as badly as having none at all.
Sealing Exterior Doors Against Winter Wind
Doors leak at the sides, the top, and especially the bottom, where the gap to the threshold is often the widest. Fit foam or tubular weatherstripping to the sides and top of the frame, choosing a profile that compresses when the door closes but does not make it hard to shut. A door sweep or a silicone gasket fitted to the bottom edge blocks the draught at floor level, and a simple fabric door snake is a useful temporary fix while you decide on a permanent one.
Before fitting anything, check the door itself. A door that has dropped on its hinges will never seal properly, so tighten or replace the hinge screws and adjust the strike plate first. If daylight shows around the frame, the frame may have moved, and a bead of exterior caulk around the outside of the architrave can close the gap. Keep at least one window in each room operable for safety and ventilation, and never seal a door that serves as a fire exit or an escape route.
Caulking the Fixed Joints Around Frames and Siding
Caulk is for joints that never move: the seam where a window or door frame meets the wall, cracks in siding, and gaps around exterior trim. Use an exterior-grade acrylic latex caulk with silicone, which stays flexible through seasonal movement and resists rain. Cut the nozzle at 45 degrees, apply a steady bead slightly narrower than the gap, and smooth it with a wet finger or a caulk tool. Allow at least 24 hours to cure before painting over it.
Do not use caulk where a moving part needs to close, because it will glue the window or door shut or crack the first time it is opened. For gaps wider than a fingertip, push a foam backer rod into the gap first so the caulk has something to grip and does not sink in too deep. Work in dry weather above about 10 degrees Celsius, since cold or wet surfaces stop caulk from bonding, and re-check old caulk each autumn: cracked or peeling beads are a clear sign it is time to strip and redo them.
Blocking the Hidden Leaks Around Pipes, Vents, and Outlets
Fixed penetrations are the leaks most homeowners never think about. Electrical outlets and switch plates on exterior walls can admit a surprising amount of cold air, and the fix is a pre-cut foam gasket that fits behind the cover plate in seconds. Turn off the power at the breaker before removing a plate, fit the gasket, and refit the plate; the whole job takes minutes per outlet and costs very little.
Gaps around plumbing pipes, dryer vents, and cable entry points need a different approach, since they are usually too large for caulk. Low-expansion foam sealant is made for this job: it expands gently to fill the void without bowing the surrounding frame, then sets into a durable, airtight bond. Use it around the attic hatch frame as well, and line the hatch itself with foam weatherstripping plus a layer of rigid insulation on the top side. Remember not to block vents that a gas appliance, a bathroom fan, or a dryer depends on for safe operation.
Window Treatments That Slow Heat Loss Through Glass
Even a well-sealed window loses heat through the glass itself, and window treatments are the simplest way to slow that loss. Cellular, or honeycomb, shades are the most effective common option: their pockets trap still air, and when fitted inside the frame with only small side gaps, they can cut heat loss through the window substantially. Heavy lined curtains help too, especially when they reach the floor and close fully over the frame, trapping a layer of still air between the fabric and the glass.
Use treatments actively through the day. Open curtains on south-facing windows during sunny winter hours so free solar heat enters, then close everything as the light fades to trap that warmth inside. For windows you do not plan to open in winter, a temporary glazing film kit adds a clear plastic layer that creates an insulating air pocket; shrink it taut with a hairdryer for a nearly invisible result. These measures cost far less than replacement windows and can be removed or changed without any building work.
Weatherproofing Mistakes That Waste Money or Cause Damp
The most common mistake is sealing everything and forgetting ventilation. A house that is airtight but has no controlled fresh air can develop condensation on windows, stale air, and mould, especially in kitchens and bathrooms. Keep trickle vents open, use extractor fans when cooking or showering, and leave at least one window per room operable. Weatherproofing should stop uncontrolled leaks, not seal the house like a jar.
Other mistakes are easier to avoid. Do not use interior caulk outside, where rain and frost will destroy it within a season. Do not block combustion air supplies for boilers, stoves, or open fires. Do not cover weep holes in brickwork or seal the gaps that let a wall cavity drain. And do not assume new windows will fix a draughty house on their own: if the leaks are in the wall, the attic, and the floor, even the best windows will leave the house cold. Fix the envelope as a system, starting with the largest leaks.
Final Thoughts: A Warmer Home Without Seasonal Energy Loss
Weatherproofing is one of the highest-return jobs in home improvement: a weekend of sealing, a modest spend on weatherstripping, caulk, and gaskets, and a house that stays warmer in winter, cooler in summer, and cheaper to run all year. Start by finding the drafts, fix the biggest leaks first, and work through the house room by room. Keep ventilation working, re-check the seals each autumn, and replace worn weatherstripping before it fails. Your heating system will run less, your rooms will feel more comfortable, and the draughts that used to whistle around the doors will simply be gone.
Home Weatherproofing FAQs
How much energy can weatherproofing save?
Savings depend on how leaky the house is to start with, but sealing air leaks is widely regarded as one of the most cost-effective energy measures available. Very draughty homes often see the biggest improvement, while already tight homes gain less. An energy audit gives the most realistic estimate for your house.
What is the difference between caulk and weatherstripping?
Caulk seals fixed joints that never move, such as the seam between a window frame and the wall. Weatherstripping seals moving parts, such as the gap between a door and its frame, and it compresses each time the door closes. Using the wrong one in the wrong place is a common reason seals fail early.
Can I weatherproof my home myself?
Most weatherproofing is straightforward DIY: foam tape, caulk, outlet gaskets, and door sweeps need only basic tools and a clean, dry surface. Attic work, sealing around gas appliances, and anything involving ladders or roof access is better left to a professional.
How often should weatherstripping be replaced?
Foam weatherstripping typically lasts one to five years, while tubular rubber and metal V-strip can last much longer. Check seals each autumn by closing a piece of paper in the door or window: if it slides out easily, the seal has worn and needs replacing.
Will sealing drafts cause condensation or mould?
It can if ventilation is blocked at the same time. Keep trickle vents open, run extractor fans in wet rooms, and avoid drying laundry indoors without ventilation. Controlled ventilation plus sealed leaks is the combination that keeps a home both warm and healthy.
Should I weatherproof in summer or winter?
Autumn is ideal, so the house is sealed before the cold arrives, but most jobs can be done in any dry weather above about 10 degrees Celsius. Avoid applying caulk or adhesive weatherstripping in freezing or wet conditions, since it will not bond properly.