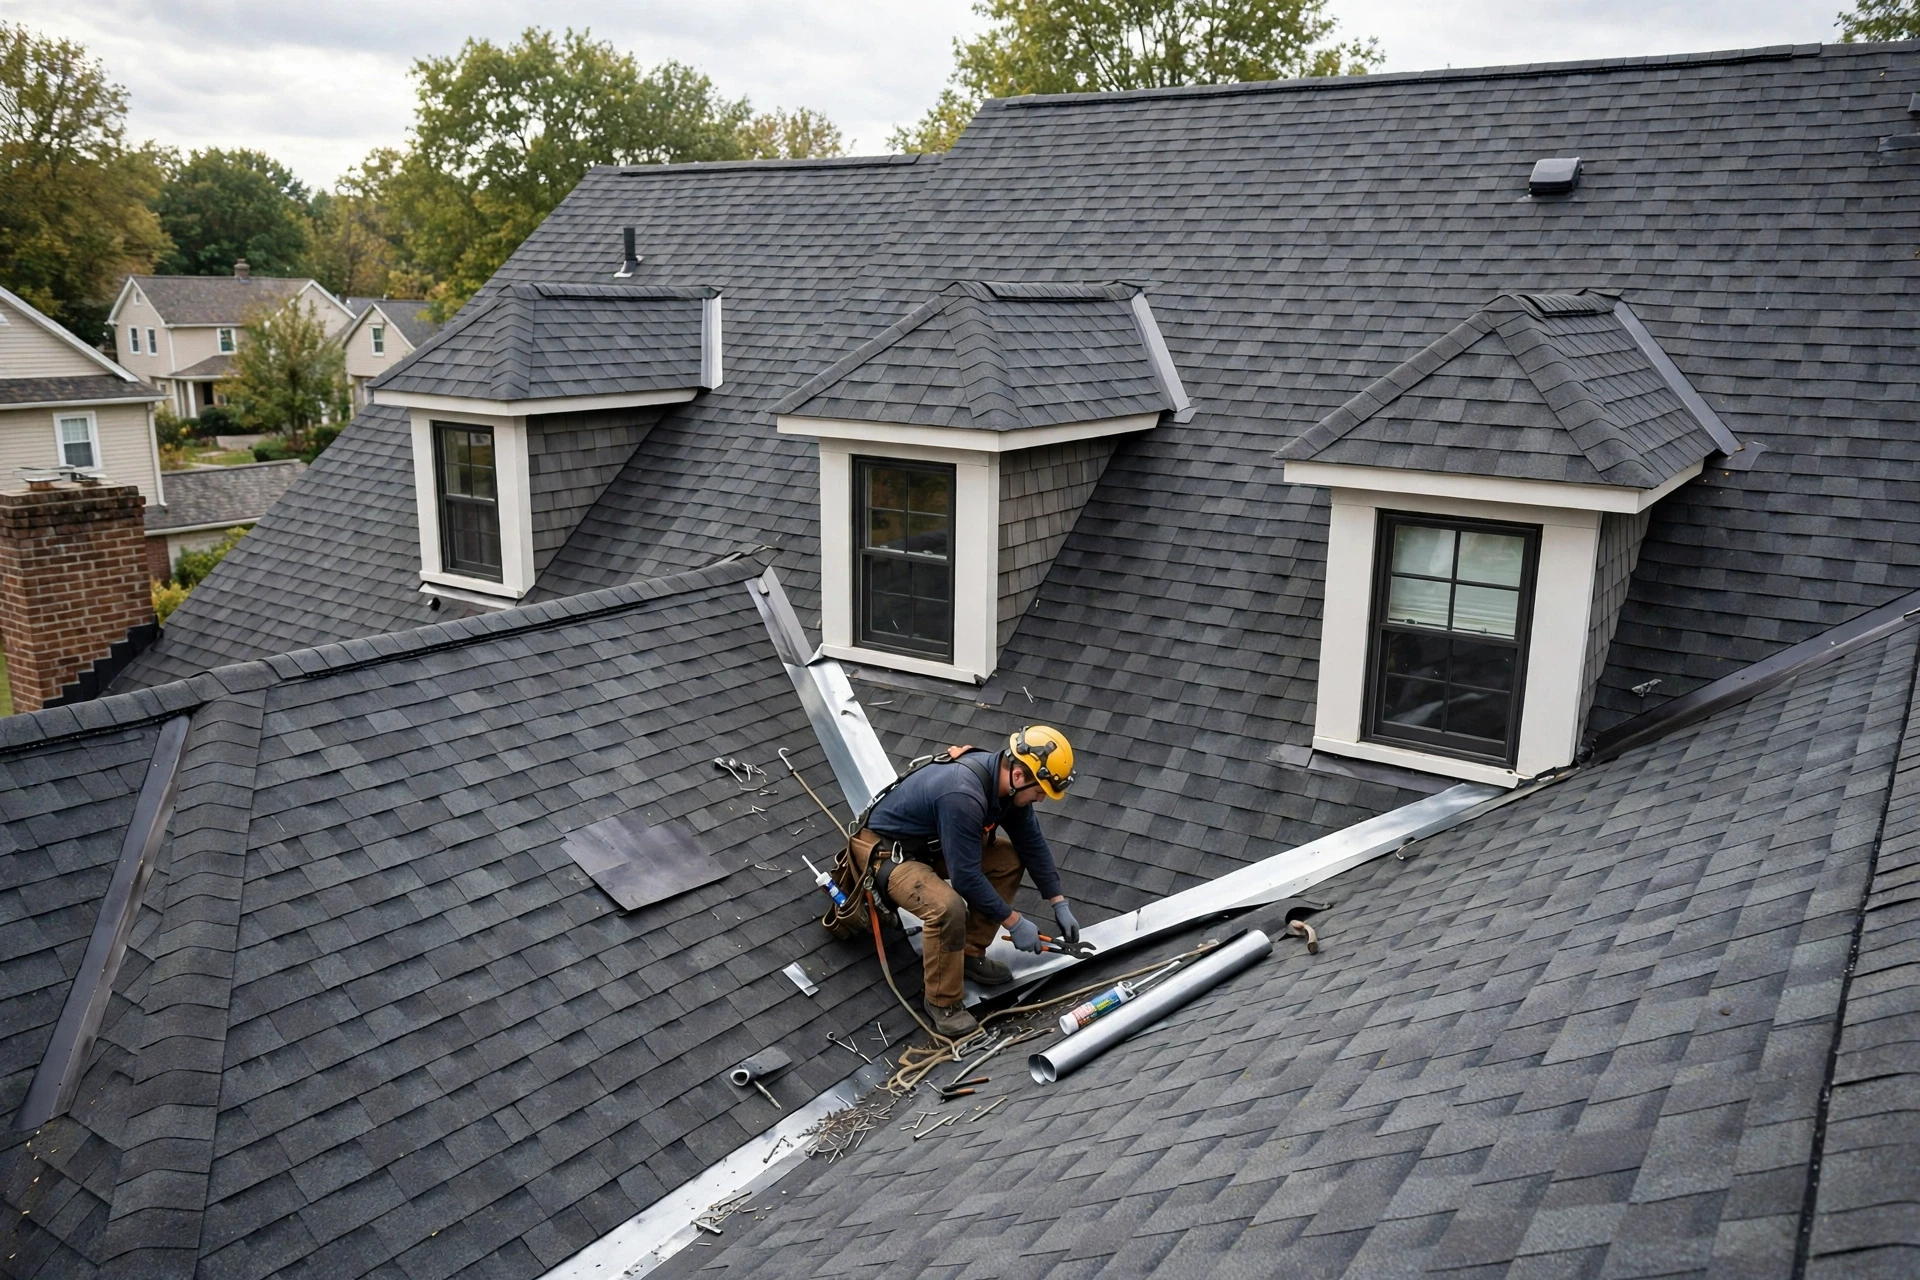
A plain, unbroken roof slope almost never leaks. The leaks start where the roof changes direction — in valleys where two slopes meet, at dormer sidewalls where a vertical wall rises from the slope, and at every penetration that interrupts the shingles. Industry guidance puts roughly 95 percent of roof leaks at these flashing points, not in the field of shingles. Preventing penetration through complex intersections is therefore a flashing job first and a shingle job second: layered metal, self-adhering membrane underneath, and overlaps that always shed water downhill.
This guide explains how water moves through roof intersections, which flashing details protect each one, the mistakes that cause most dormer and valley leaks, and what repairs typically cost. Figures are broad planning estimates, and roofing work at height is dangerous — anything beyond a ground-level inspection belongs to a licensed roofer.
Why Roof Intersections Leak When the Field Stays Dry
A roof field is simple: overlapping shingles shed water downhill by gravity, each layer lapping over the one below. An intersection breaks that simplicity. Where two slopes meet, water from both planes concentrates into one channel. Where a wall rises from a slope, water running down the wall meets water running down the roof, and the joint must handle both. Where a dormer sits, the roof turns a corner in three directions at once, and the framing, cladding, and underlayment all have to integrate with the flashing.
That concentration is what makes intersections vulnerable. A valley carries several times the water volume of the same width of plain slope, and during wind-driven rain the flow can run uphill under a shingle edge if the overlap is wrong. Dormer valleys sit in partial shade and collect snow the main roof sheds elsewhere, so they see more ice and freeze-thaw cycling. The materials are not the problem — shingles and metal last decades — the geometry is, and the fix is always in the detailing.
How Water Travels Through Valleys, Dormers, and Wall Joints
Water on a roof follows three rules: it runs downhill, it is pushed sideways by wind, and it is pulled into gaps by capillary action. A good intersection design respects all three. Overlaps must shed water onto the layer below, never trap it. Metal must extend far enough up the wall and out onto the deck that wind cannot drive rain past its edge. And no fastener should sit in the water channel, because every nail hole in a valley or wall joint is a future leak.
The places where these rules break most often are:
- Valleys finished without metal flashing or membrane underneath, relying on shingles alone.
- Dormer sidewalls flashed with one long continuous strip instead of individual step flashing pieces.
- Counterflashing skipped, leaving the top edge of step flashing open to water running down the wall.
- Apron flashing at the dormer base without a kickout diverter, so water runs behind the siding.
- Ice-and-water shield membrane missing from valleys and eaves, where ice dams and wind-driven rain strike first.
If your roof is leaking near a dormer or a valley, start the diagnosis at these five points. Usually the shingles are fine and one of these details is missing, damaged, or installed backwards — and the repair is a flashing repair, not a re-roof.
Valley Flashing: Handling the Highest Water Volume on the Roof
A valley is the highest-volume water path on a residential roof, and its flashing has to be sized for it. The standard detail starts with a self-adhering ice-and-water shield membrane centred in the valley, extending at least 18 inches onto each adjacent slope, to give a second, impenetrable layer beneath the metal. Over that goes a minimum 24-inch-wide strip of metal flashing, pre-bent into a V or W shape, with the centre crimp keeping water from crossing the channel. The metal is nailed only along its outer edges, at least six inches from the centre line, so no fastener sits in the flow.
Valleys are finished open or closed. An open valley leaves a consistent channel of exposed metal — typically four to six inches wide — with shingles trimmed back from the centre line and their top corners clipped to direct water away from the cut edge. Open valleys move water and slush freely, resist ice trapping, and are the most reliable choice in heavy rain and snow. A closed valley runs shingles across the centre line, hiding the metal; it can work on lower-slope sections but is more prone to granule wear and ice damage. For dormer valleys, open metal valleys are the safer choice, and the membrane underneath should extend further up both sides than the minimum.
Step Flashing and Counterflashing at Dormer Sidewalls
Step flashing is the single most important flashing type for any dormer, and it belongs along the sidewalls where the sloped roof meets the vertical dormer wall. Each piece is a small L-shaped metal shingle, typically 5 by 7 inches, installed one at a time and woven in with each course of roof shingles as the roofer works up the slope. Each piece extends at least four inches up the wall and four inches out onto the deck, and overlaps the piece below by at least two inches, so water is handed from piece to piece and back out onto the shingles at every course.
The critical rule is that step flashing is never one long continuous strip bent to fit the slope. A continuous piece cannot accommodate the roof’s thermal movement and will crack or pull away from the wall within a few years. Counterflashing is the second half of the system: a metal cover fixed to the wall that laps over the top edge of the step flashing by at least two inches, so water running down the wall cannot get behind it. Skipping counterflashing and relying on caulk alone is one of the most common shortcuts behind dormer leaks.
- Start at the bottom: lay the first step flashing piece over the starter shingle, bent up against the wall.
- Lay the first full shingle course over the roof leg of the flashing piece.
- Set the next flashing piece over that shingle, overlapping the piece below by at least two inches.
- Repeat up the slope, one piece per shingle course, fastening only to the deck so pieces can move.
- Finish by fixing counterflashing to the wall, lapping two inches over the step flashing tops.
Galvanized steel and aluminium are the common materials; copper lasts longest but costs far more. Keep dissimilar metals apart — aluminium against copper will corrode — and never nail through the exposed roof surface where water flows.
Apron Flashing, Kickout Diverters, and the Dormer Base
The bottom corner of a dormer, where its front wall meets the main roof slope, is one of the most leak-prone spots on a house. Water running down the dormer face arrives at the roof and has to be turned sideways into the gutter, and if the turn is missing it runs straight behind the siding and into the wall. Apron flashing — a wide piece of metal at the base of the dormer wall, bedded in roof cement — makes that turn, but only if it includes a kickout: an upward bend at its lower end that throws water away from the wall into the gutter.
Kickout diverters are small, cheap, and very often missing, because they are installed last and look like a detail. Their absence is a leading cause of rotted sheathing and siding at dormer bases, and the damage is usually hidden until it is extensive. When inspecting a dormer, look for the kickout first: if water from the dormer face can run down the wall and meet the roof without a diverter, the joint will leak eventually. The same detail applies at any roof-to-wall junction where a wall ends above a lower roof, and it is required by the International Residential Code in many jurisdictions.
Underlayment and Ice-and-Water Shield as the Second Line
Flashing is the first line of defence; underlayment is the second. A self-adhering polymer-modified bitumen membrane — commonly called ice-and-water shield — seals around fasteners and stops water that gets past the shingles or flashing from reaching the deck. It belongs in every valley, along eaves and rakes, up dormer walls at least eight inches from the deck, and anywhere two roof planes meet. Synthetic underlayment covers the rest of the deck, lapping over the membrane as instructed.
The order of installation matters as much as the materials. Membrane goes down first in valleys and at eaves, before the metal flashing; underlayment laps over the membrane so water always flows from one layer onto the next, never under it. The membrane must be applied to a clean, dry deck in suitable temperatures, or it will not bond, and it must be covered promptly — prolonged sun exposure degrades it. Think of the membrane as insurance: on a well-flashed roof it never gets tested, but on the day a shingle lifts or a flashing seam opens, it is the layer that keeps water out of the house.
| Intersection | Primary flashing | Membrane | Common failure |
|---|---|---|---|
| Open valley | 24-inch V or W metal, nailed at edges | Ice-and-water shield, 18 inches each side | Fasteners in the water channel |
| Closed valley | Metal under shingles | Ice-and-water shield full width | Granule wear, ice damage |
| Dormer sidewall | Step flashing, 5×7 inches per course | Shield 8 inches up the wall | Continuous strip, no counterflashing |
| Dormer base | Apron flashing with kickout diverter | Shield at the wall-to-roof joint | Missing kickout, water behind siding |
| Roof-to-wall | Step + counterflashing | Shield up the wall | Caulk relied on instead of metal |
What Dormer and Valley Leak Repairs Cost
Costs vary with roof height, access, and how much has to come apart, so treat these as broad planning estimates. Re-flashing a single dormer sidewall or a short valley typically runs into the high hundreds to low thousands of dollars, including removing and replacing the shingles over the repair. A full valley re-flash costs more, and a dormer needing its base rebuilt for hidden rot can run into several thousand dollars once damaged sheathing and siding are replaced.
The expensive repairs are almost always the ones that were postponed. A small flashing leak that stains a ceiling is cheap to fix; the same leak left for two winters rots the deck, the sheathing, and sometimes the framing, and the repair becomes a structural job. That is why a roof inspection after any major storm, and a look in the attic after the first heavy rain of the season, are worth the habit. Catch a flashing failure early, and the fix stays small.
Roof Intersection Leak FAQs for Homeowners
Why does my roof only leak in heavy rain?
Because light rain never reaches the weak point. Heavy rain and wind drive water sideways under shingle edges and into valleys at volume, and that is when a missing membrane, a short overlap, or a fastener in the channel finally shows up as a leak.
Can I fix dormer flashing myself?
Not safely, in most cases. Dormer flashing work means removing shingles on a slope, working at height, and getting overlaps exactly right. A small caulk repair is a DIY job; re-flashing a dormer belongs to a licensed roofer with fall protection.
How long should valley flashing last?
Metal valley flashing typically lasts as long as the roof covering — 20 to 30 years for asphalt shingles, longer for metal roofing — provided it was installed with membrane underneath and no fasteners in the water channel.
What is a kickout diverter and do I need one?
A kickout is a small bend at the bottom of apron flashing that throws water away from the wall into the gutter. Every roof-to-wall junction where a wall ends above a lower roof needs one, and its absence is a leading cause of rotted siding at dormer bases.
Are open valleys better than closed valleys?
Usually, yes — especially in heavy rain and snow. Open valleys move water and slush freely and resist ice trapping, while closed valleys hide the metal and are more prone to granule wear and ice damage. Closed valleys can work on lower slopes with good membrane underneath.
How do I know if a leak is from flashing or from the shingles?
Location is the clue. Leaks near valleys, dormers, chimneys, or wall joints are almost always flashing problems, since roughly 95 percent of roof leaks start at flashing points. Leaks in the middle of a plain slope point to damaged shingles or underlayment.
Final Thoughts: Keeping Complex Roofs Dry for Decades
A complex roof is not a problem to fear — it is a set of details to get right. Valleys need wide metal over membrane, dormer sidewalls need step flashing with counterflashing, and every dormer base needs a kickout diverter. None of these details is expensive, and none is visible once the roof is finished, which is exactly why they get skipped. Insist on them, check them after the first big storm, and your intersections will stay dry for the life of the roof.