A basement bedroom without a legal way out is not a bedroom at all, no matter how nice the flooring looks. If you are finishing a basement and adding a sleeping room, an egress window is what turns that room into a lawful, insurable, sellable space, and it is the exit that could save someone's life in a fire. Yet egress windows are widely misunderstood: homeowners routinely buy a window that looks big enough, only to fail inspection because the opening it provides is too small.
The direct answer is this: under the International Residential Code (IRC) Section R310, a basement sleeping room needs an emergency escape window with a net clear opening of at least 5.7 square feet (5.0 square feet for openings at or below grade), a clear height of at least 24 inches, a clear width of at least 20 inches, and a sill no higher than 44 inches above the finished floor. Below-grade windows also need a window well of at least 9 square feet, with a ladder or steps when the well is deeper than 44 inches, and the window must open from inside without keys or tools.
Basement Egress Windows at a Glance: The Escape Route Your Renovation Must Include
An egress window is an emergency escape and rescue opening. It serves two people in an emergency: the occupant climbing out, and the firefighter climbing in with equipment. That dual purpose explains why the code is so specific. A decorative basement window, a glass block panel, or a small hopper window may admit light and air, but none counts as egress unless it meets every dimension in the code at the same time.
Two terms matter more than any other here. Net clear opening means the actual free space available when the window is fully open, not the size of the frame, the glass, or the rough opening. Sill height is measured from the finished basement floor to the bottom of the clear opening. Both are checked at inspection, and both are where do-it-yourself projects most often fail.
- Every basement sleeping room needs its own compliant egress opening.
- Basements without sleeping rooms still need at least one emergency escape opening.
- The opening must work from inside without keys or tools.
- The well, ladder, and drainage plan are part of the installation, not extras.
When a Basement Renovation Legally Requires an Egress Window
The trigger most homeowners miss is the sleeping room. Under IRC R310, adding a bedroom to a basement requires a compliant egress opening in that room before the permit can be approved. It does not matter whether you call the room a den or study on the plans if it is used as a sleeping room; inspectors judge the room by its features, not its label.
Existing basements are treated differently: routine alterations generally do not trigger a new egress requirement, and older windows are often grandfathered in. But the moment you create a new sleeping room, the exemption ends for that room. Plan egress early, too. Cutting a foundation opening is far easier before framing and drywall go up, and local jurisdictions adopt different editions of the IRC, so confirm your plan with the local building department before ordering anything.
IRC R310 Egress Dimensions, Decoded: Net Clear Opening, Sill Height, and Well Size
The IRC numbers look simple until you do the math. The minimum net clear opening is 5.7 square feet above grade and 5.0 square feet for grade-floor and below-grade openings, which covers most basement windows. The clear height must be at least 24 inches and the clear width at least 20 inches. Meeting those minimums alone is not enough: a 20-inch by 24-inch opening provides only about 3.3 square feet. A 20-inch-wide opening needs to be roughly 41 inches tall to reach 5.7 square feet.
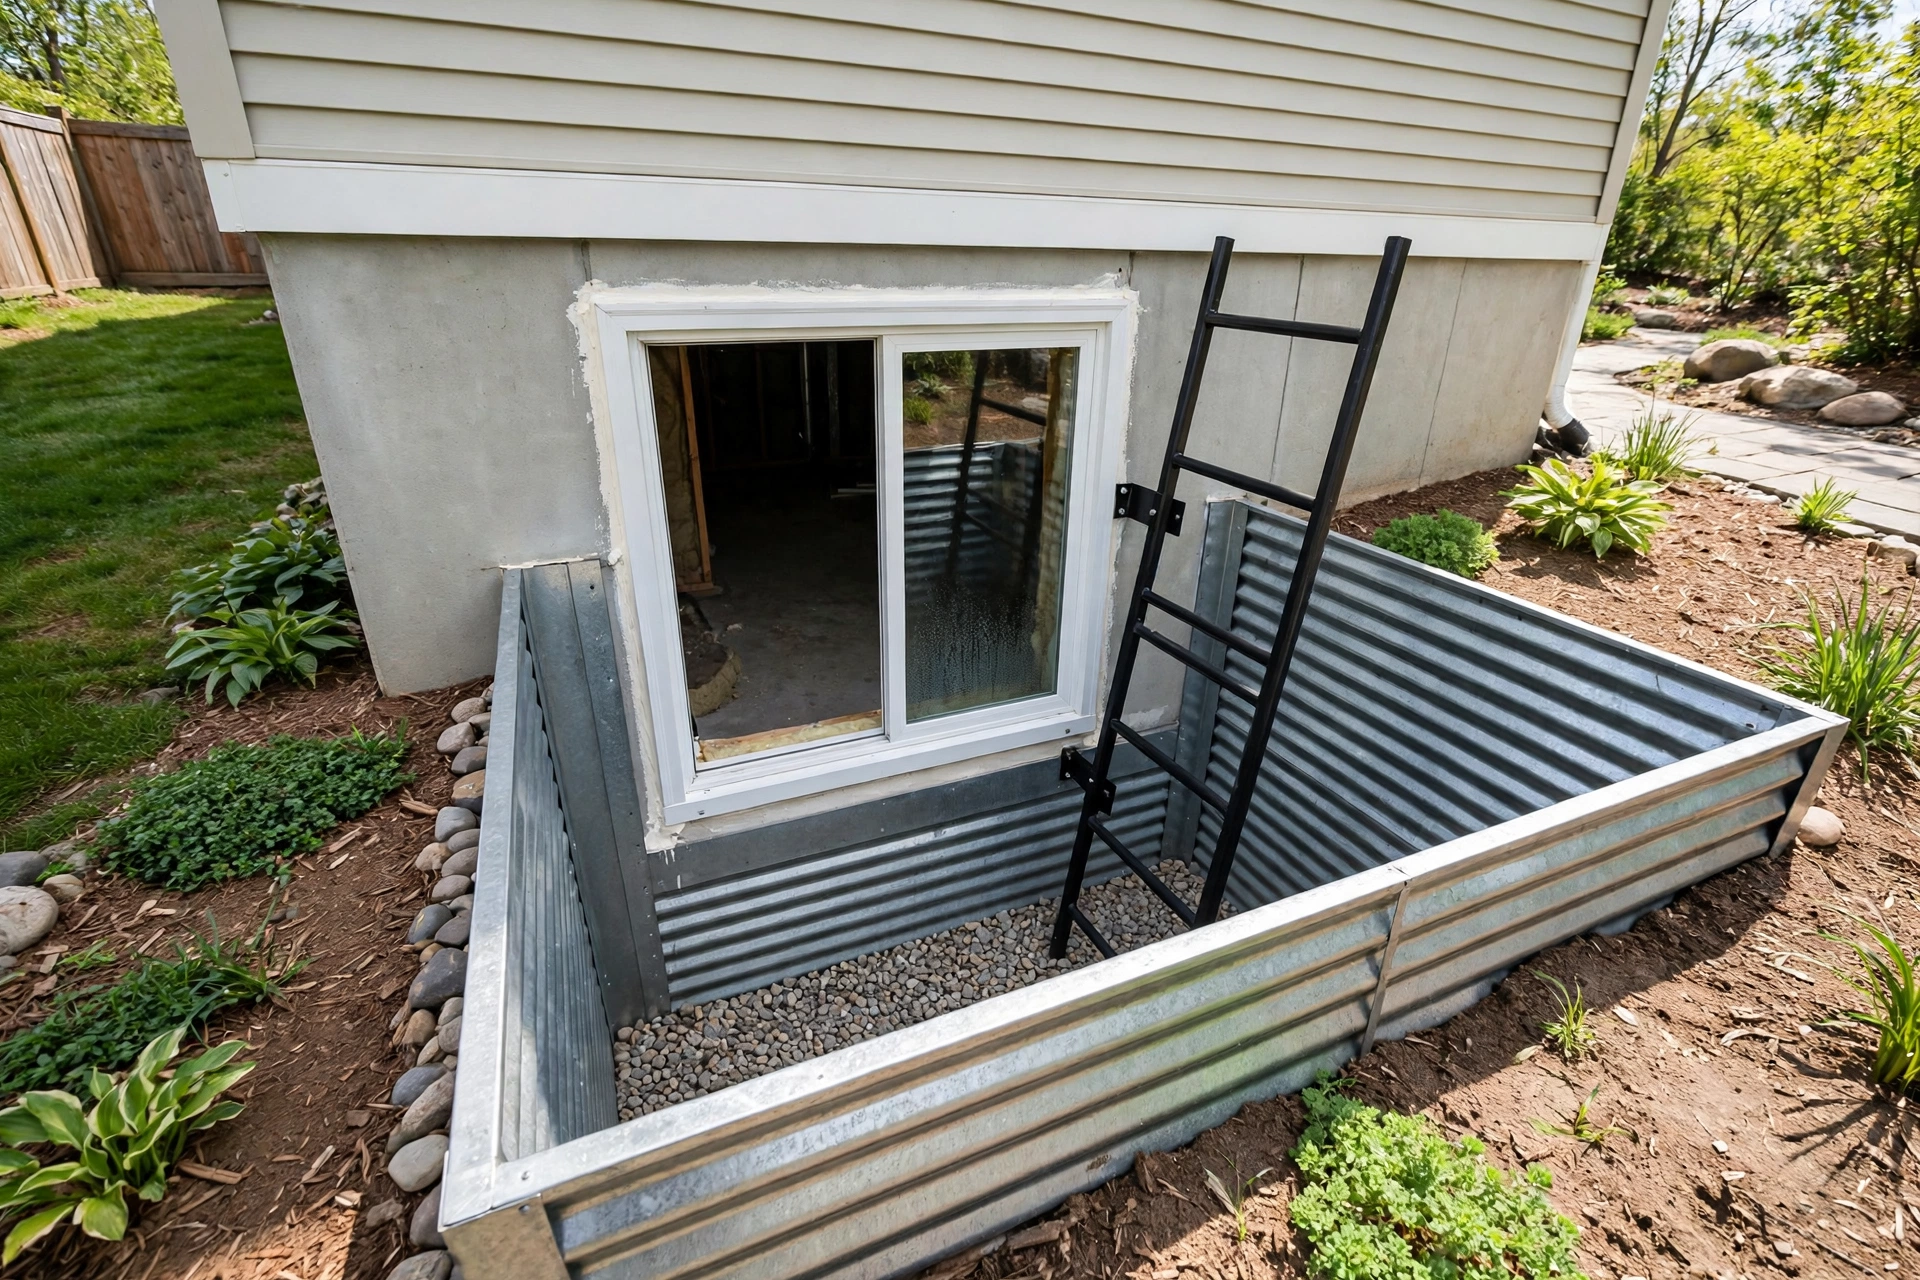
Sill height is the other frequent failure point: the bottom of the clear opening may sit no more than 44 inches above the finished floor. Window wells need at least 9 square feet of floor area, extending at least 36 inches out from the wall, with a permanently attached ladder or steps when the well is deeper than 44 inches. Any well cover must open from inside without tools and must not block the escape path.
Casement, Sliding, or Double-Hung: Which Egress Window Style Passes Inspection Easiest
Casement windows are the standard choice for basement egress, and the reason is geometry. A casement window cranks open on a side hinge, so nearly the entire frame becomes clear opening. That means you can meet the area requirement with the smallest possible cut in the foundation, which matters when you are paying for concrete cutting and when wall space is tight.
Sliding windows cost less per unit but only half the frame opens, so the window must be roughly twice as wide to provide the same clear opening. A slider that must deliver a 20-inch clear width needs to be about 40 inches wide overall, and the extra concrete cutting often erases the savings. Double-hung windows face the same problem. Material choice is secondary to dimensions: vinyl is most common because it resists moisture and costs less, while fiberglass holds up better in wide openings. Confirm the manufacturer's published net clear opening for the exact size you are ordering.
From Foundation Cut to Finished Trim: How an Egress Window Installation Actually Unfolds
A professional egress installation follows a predictable sequence. Expect the exterior work to take a day or two and the full job, including interior finishing, to take several days, longer if the soil is rocky or access is tight.
- Permits and layout: confirm the location, check for utilities and pipes in the wall, and pull the permit.
- Excavation: dig out the well area, wider and deeper than the finished well.
- Foundation cutting: a diamond-bladed saw cuts the opening; a lintel goes in above it to carry the wall load.
Drainage bed: gravel is spread at the bottom, and the well drain is connected to the footing drain or daylight.
- Well and window setting: the well is secured to the wall; the window is set, shimmed, flashed, and sealed.
- Backfill and grading: soil is backfilled in layers and grade is sloped away from the well.
- Inspection and finishing: the inspector verifies dimensions, ladder, drainage, and operation; trim follows.
Two steps deserve extra attention. The lintel above the opening is structural: cutting a hole without proper support can crack the wall above. And the waterproofing around the new opening matters as much as the window itself, because a new penetration in a foundation wall is a new place for water to enter.
Window Wells, Drains, and Covers: Keeping Your Egress Exit Dry and Usable
An egress window that fills with water, ice, or leaves is not an escape route. Most wells sit on a gravel bed that drains to the footing drain system or to daylight downhill. Where neither is possible, a dedicated drain line or sump arrangement may be needed, and this is a detail to settle during quoting, not after the first heavy rain.
Galvanized steel wells are strong and economical but can rust over decades in wet soil. Polyethylene wells resist corrosion and are lighter to install, though they need careful backfilling to avoid bowing. Covers deserve a decision of their own: a good cover keeps out rain, leaves, and pets while still opening easily from below with a push. Test it from inside after installation; if you cannot push it open in the dark, it is the wrong cover.
What an Egress Window Installation Typically Costs, and What Pushes the Price Up
Costs vary widely by region, foundation type, and site access, so treat every figure below as an estimate for planning, not a quote. Contractor price lists commonly put a full egress window and well installation at roughly $3,000 to $6,000 for a straightforward basement, with the window unit itself accounting for roughly $400 to $1,200 before cutting and installation. A well alone, where the opening already exists, typically runs roughly $500 to $1,500 installed. Rock excavation, deep wells, or limited access can push a project toward $7,500 or more.
Three factors move the price most: foundation material, since block walls cut faster than poured concrete; depth and access, since a walk-out basement with machine access costs less to excavate; and bundling, since shared mobilization and permits usually lower the cost per window when two or three are installed together. Get at least two itemized quotes separating the window, well, cutting, drainage, and permit.
Egress Window Mistakes That Fail Inspections and Flood Basements
The most expensive egress window is the one you install twice. The first common mistake is ordering by frame size instead of net clear opening, which produces a handsome window that fails inspection by a few square inches. The second is placing the sill above 44 inches, often because the crew matched the height of an existing small window. The third is a well that is too small, too shallow, or missing its ladder, which fails the escape test even when the window itself passes.
Water mistakes are the second category: skipping the gravel drainage bed, backfilling with clay soil that holds water against the wall, or grading the yard toward the well. Finally, the finishing mistakes: drywall returns that narrow the opening, trim that blocks the sash, or a well cover bolted down for security. Measure the finished, trimmed opening, not just the rough one.
Staying Safe While Cutting Concrete: Structural Risks, Utilities, and When to Hire a Licensed Pro
Foundation cutting is not a beginner do-it-yourself project. A concrete saw throws silica dust that requires respiratory protection and dust control. The wall carries the weight of the house above, so the opening needs a lintel and sometimes temporary shoring. Electrical lines, gas pipes, and water lines can run through or near the wall, and calling your local utility-locating service before excavation is standard practice.
A licensed contractor is the right call when the wall is poured concrete, when the opening is wider than a standard window, or when the soil is unstable or the water table is high. Homeowners can still save money by handling interior finishing, painting, and landscaping themselves after the structural work is inspected. If a quote seems unusually low, ask what is excluded: permits, drainage, lintel, cover, and interior finishing are the items most often left out.
Basement Egress Window Questions Renovators Ask Before Cutting Concrete
Does every basement bedroom really need its own egress window?
Yes. Under the IRC, each basement sleeping room needs its own compliant emergency escape opening. A single egress window elsewhere in the basement does not make a separate bedroom legal.
Can I enlarge my existing basement window instead of cutting a new opening?
Often, yes, and it is usually cheaper. If the existing window is in the right room and the wall allows a larger cut, the opening can be widened and lowered to meet the code, with a compliant well added outside.
Do I need a permit for an egress window installation?
In most jurisdictions, yes. Cutting a foundation opening is structural work, and the permit triggers the inspection that confirms the dimensions, lintel, drainage, and ladder. Unpermitted egress work can cause problems at resale.
What happens if my window well fills with water?
Standing water usually means the drainage bed is clogged, the well drain is disconnected, or the yard grades toward the well. Clear the drain and debris first, then check the grading.
How long does an egress window installation take?
The exterior cutting and well work typically takes one to two days for a straightforward site, with the full job including inspection and interior finishing taking several days.
Final Thoughts: Making Your Basement Bedroom Legal, Safe, and Sellable
An egress window installation is structural, code-driven work, but its purpose is simple: anyone sleeping in your basement should be able to get out quickly in an emergency, and a firefighter should be able to get in. Start with your local building department, size the window by net clear opening rather than frame size, and plan the well drainage before you dig. Your next step is a short call to your building department, followed by two itemized quotes from contractors experienced in foundation cutting.