A bathroom can look spotless while trouble builds behind the tile. The grout is clean and nothing drips onto the floor, yet water is quietly soaking into the wall cavity, the subfloor, or the ceiling below. By the time a stain appears or a tile comes loose, the damage is often months old and far more expensive than the leak that caused it.
- The short answer: the most effective bathroom waterproofing improvements are a continuous membrane behind shower tile, sealed corners and pipe penetrations, a correctly sloped shower floor, a flood test before tiling, flexible sealant at every change of plane, and an exhaust fan that vents humid air outdoors. Together, these upgrades keep water on the surface and let you prove the system works before it is covered up.
Why a Bathroom Can Look Dry While Its Walls Are Soaking
Tile and grout are not waterproof. Grout is porous, and even glazed tile lets small amounts of water through its joints. That water is supposed to hit a waterproof membrane behind the tile and drain away. When the membrane is absent, torn, or poorly joined, water passes straight into the structure instead. Once inside a wall cavity, water dries very slowly, because there is little airflow behind tile. Timber can soften, fasteners can corrode, and mould can grow where no one sees it. The first visible clue often appears elsewhere: a stain on the ceiling below, paint bubbling behind the shower, or a skirting board that swells away from the wall.
Where Hidden Bathroom Moisture Actually Starts
Hidden moisture rarely comes from one dramatic flood. It usually comes from small, repeated wetting at the same weak points:
- Shower corners and wall-to-floor junctions, which move slightly as a building settles, so rigid grout cracks there and water slips behind the tile.
- Shower niches, benches, and half-walls, whose horizontal surfaces collect water and are easy to under-seal.
- Pipe penetrations, where every valve and showerhead arm passes through the waterproofing layer and an unsealed gap becomes a channel into the wall.
- The shower drain connection, where a membrane not properly bonded to the drain flange lets water bypass the drain and soak the floor structure.
Water does not need a large hole. A pinhole at a corner or a hairline gap around a pipe can admit enough water over months to saturate timber and feed mould. Waterproofing improvements therefore focus on continuity: every seam, corner, and penetration sealed.
Liquid-Applied Versus Sheet Membranes: Picking the Hidden Layer for Your Shower
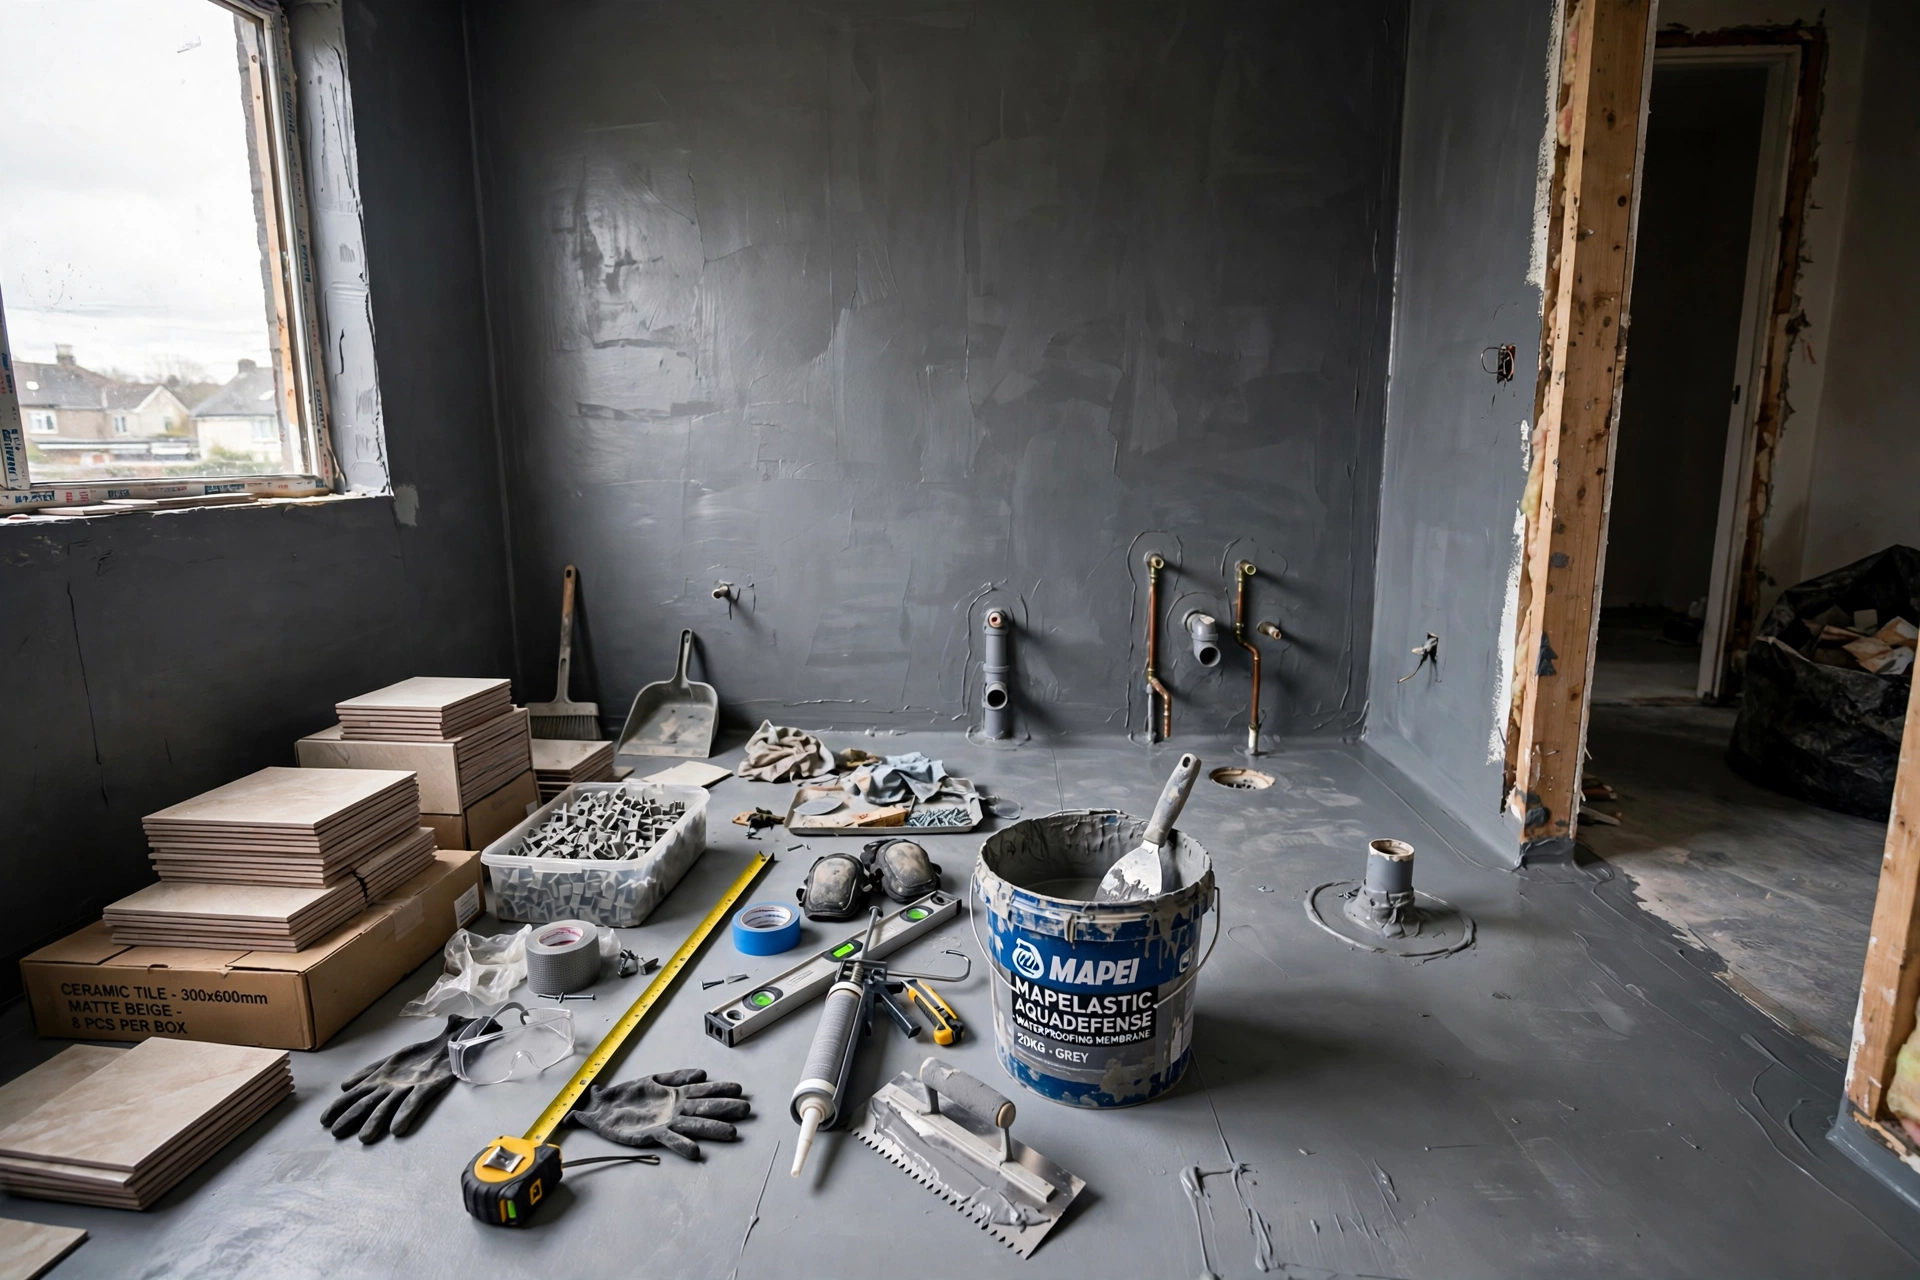
Liquid-applied membranes are brushed or rolled onto cement backer board and cure into a seamless, flexible sheet. They conform easily to irregular surfaces, niches, and pipe penetrations, which suits complex shower shapes. Manufacturers typically require at least two coats applied in perpendicular directions, to a dry film thickness often in the range of 20 to 30 mils, with curing times of roughly 12 to 24 hours before tiling. The risk with liquids is thin spots: a coat rolled too thin, or a missed pinhole, leaves a weak point that is invisible once tiled.
Sheet membranes are factory-made sheets bonded to the substrate with thinset mortar, giving a consistent thickness across flat surfaces. Seams are overlapped, typically by at least two inches, and sealed with manufacturer-supplied bands, while corners and pipe penetrations use preformed pieces. Both systems need a suitable substrate, usually cement backer board or foam board. Note that cement backer board itself is moisture-resistant but not waterproof, which is exactly why the membrane must sit between the board and the tile.
The 24-Hour Flood Test That Proves a Shower Pan Before Tile Hides It
The flood test is the single most valuable waterproofing step a homeowner can ask for, and it costs almost nothing in materials. Once the membrane has cured, the drain is plugged and the shower pan is filled with water to just below the top of the curb. The water level is marked, and the pan is left undisturbed for at least 24 hours; some manufacturers and codes call for up to 72 hours. If the level holds, allowing only for minor evaporation, the membrane is watertight. After tile is installed, the membrane can never be inspected or repaired without removing the tile and screed above it.
- Confirm the membrane has fully cured before filling the pan.
- Plug the drain securely with a test plug that seals without damaging the flange.
- Fill to just below the curb so water covers the pan floor and reaches the lower walls.
- Mark the water level with a pencil line or tape for an exact reference.
- Wait at least 24 hours, checking the ceiling or room below for dampness.
- Repeat if needed. A significant drop means a leak: drain, repair, and test again until the level holds.
Grout, Silicone, and Drain Details That Keep Water on the Surface
The membrane does the heavy waterproofing, but the surface layers decide how much water reaches it. First, grout choice. Cement-based grout is porous and should be sealed after it cures, then resealed roughly every one to two years in a shower. Epoxy grout is non-porous and does not need sealing, which makes it a strong choice for shower floors and the lowest stretch of wall tile. It costs more and is harder to work with, but it removes an entire maintenance task.
Second, changes of plane. Wherever two surfaces meet at an angle, the joint moves slightly, so filling it with rigid grout guarantees cracking. These joints should be filled with a flexible, waterproof silicone sealant instead, and inspected at least once a year. Third, the drain and the slope. A shower floor should slope toward the drain at roughly one quarter inch per foot, so water runs off rather than pooling, and drain weep holes, where the system has them, must be kept clear.
Ventilation and Drainage Upgrades That Dry a Bathroom Between Showers
Waterproofing keeps liquid water out of the structure, but a bathroom also produces large amounts of water vapour, and vapour causes its own hidden damage. Warm, humid air condenses on cold surfaces inside walls and ceilings, feeding mould in places that never see a splash. Common guidance calls for an exhaust fan rated at about 50 cubic feet per minute for an intermittently used bathroom, or roughly 20 to 25 cubic feet per minute for a continuously running fan. The fan must duct directly outdoors, never into an attic or ceiling cavity, or the moisture is simply relocated. A humidity-sensing switch or a timer that keeps the fan running for 20 to 30 minutes after a shower makes a large difference.
A Seasonal Bathroom Moisture Checklist You Can Run Without Opening a Wall
You do not need to demolish anything to catch hidden moisture early. A short inspection every few months can reveal problems while they are still small and cheap to fix.
- Tap the shower tiles. Hollow or drummy sounds suggest the adhesive or substrate beneath has deteriorated.
- Look at grout along the shower base and lower walls. Grout that stays dark long after showering, crumbles, or pulls away from tile edges may be holding water behind it.
- Check for white powdery residue on tiles or grout. This efflorescence often means water is moving through the assembly and carrying minerals with it.
- Smell the room after it has been closed for a few hours. A persistent musty odour is worth investigating even if nothing looks damp.
- Inspect the ceiling and walls below or beside the bathroom for stains, bubbling paint, or peeling plaster, and feel skirting boards for softness or swelling.
- Check silicone beads at corners, bath edges, and around the toilet base for cracks.
One or two of these signs alone can have an innocent explanation. Three or more together, or any sign that keeps returning after cleaning, almost always points to water getting where it should not.
What Bathroom Waterproofing Upgrades Cost, in Rough Terms
Costs vary widely by region, bathroom size, and whether walls are already open, so treat every figure here as a rough estimate, not a quotation. Waterproofing work done while a bathroom is already being renovated is far cheaper than the same work done as a standalone repair later. For a shower already stripped to the substrate, a liquid or sheet membrane system for a standard shower is typically a modest material cost, often in the low hundreds of dollars or pounds. Upgrading to epoxy grout adds a premium, commonly a few hundred more, and a replacement exhaust fan with proper outdoor ducting is usually a few hundred including installation.
A full shower rebuild after a failed membrane is a different scale of expense. Removing tile and screed, repairing damaged substrate or framing, installing a new membrane, flood testing, and retiling can run into the low thousands, before any mould remediation or repairs to the ceiling below. If your budget is tight, spend it on the membrane, the flood test, and the fan before decorative finishes.
When Hidden Moisture Means Calling a Waterproofing or Leak Specialist
Some bathroom moisture work suits a capable homeowner: resealing grout, replacing silicone beads, fitting a new fan, and running the seasonal checklist. Other situations call for a professional. Call a waterproofing or leak-detection specialist if you find soft or spongy flooring, tiles that move underfoot, mould that returns quickly after cleaning, a stain on the ceiling below that is spreading, or any sign of water near electrical fittings. A specialist can use a moisture meter, and sometimes thermal imaging, to map how far dampness has spread before any tile is removed.
If mould covers a large area, or if anyone in the household has respiratory problems, do not disturb it yourself; mould remediation has its own safety procedures, and aggressive cleaning can spread spores through the house. For a planned renovation, ask prospective contractors which membrane system they use, how they reinforce corners and penetrations, whether a flood test is included, and how the membrane connects to the drain, and get those answers in writing.
Bathroom Waterproofing Questions Homeowners Ask Before a Leak Shows
Can I waterproof a bathroom floor without removing the tiles?
Not reliably. Surface sealers can slow water down, but the membrane that actually stops water sits beneath the tile and screed, so it cannot be replaced or properly inspected without removing them. If a membrane has failed, a surface product only delays the same leak.
How do I tell a plumbing leak from a waterproofing failure?
Timing is the best clue. A leak that appears only during or shortly after showering, or a stain that spreads widely beneath the wet zone, usually points to the membrane. A leak that runs constantly, even when the bathroom has not been used, usually points to plumbing. A moisture inspection is the reliable way to confirm which one it is.
Does cement backer board count as waterproofing on its own?
No. Cement backer board is moisture-resistant, meaning it will not swell and disintegrate the way ordinary drywall does when wet, but water can still pass through it. It provides a stable substrate for tile; the membrane over it provides the waterproofing.
How long should a bathroom waterproofing membrane last?
As a rough estimate, a well-installed liquid membrane typically lasts around 10 to 15 years, and a sheet membrane around 15 to 25 years. A bathroom older than 15 years with recurring damp signs deserves a membrane check before retiling.
Is epoxy grout worth the extra cost in a shower?
In the wettest parts of a shower, usually yes. Epoxy grout is non-porous, so it does not absorb water, does not need sealing, and resists staining and mould far better than cement grout. The trade-off is higher material cost and a more demanding installation.
What should I do if mould keeps coming back in the same shower corner?
Treat returning mould as a symptom, not a cleaning problem. Clean it safely, then check the silicone bead, grout, and membrane detailing at that corner, and check whether the fan is actually venting outdoors. Mould that returns after thorough cleaning usually means water is still reaching that spot from behind the tile.
Stopping the Next Hidden Leak Starts Behind the Tile
The most important bathroom layers are the ones you cannot see: the membrane, the sealed corners, the sloped floor, and the drain connection hidden beneath the tile. Upgrades made while the walls are open, a flood test before tiling, flexible sealant at every joint, and a fan that genuinely vents outdoors cost little compared with the rebuild that follows a hidden leak. Run the seasonal checklist on your current bathroom, and if a renovation is planned, put the membrane and the flood test in the written scope.