A large roof moves. Sun heats the deck by day and cold shrinks it by night, and across a long span that movement adds up to centimetres of expansion and contraction every year. A membrane stretched tight across that movement will eventually split, and the split will let water in. A roof expansion joint cover is the flexible bridge that solves the problem: it spans the gap between two sections of roof, moves with the building, and keeps the weather out. The short answer is that the right cover matches the membrane, sits on raised curbs with proper drainage, and is inspected twice a year — and a joint that is covered properly never becomes a leak. This guide explains how the covers work, which type suits which roof, and how to install and maintain them.
Residential roofs are getting larger and flatter. Extensions, garden rooms, and modern flat-roofed houses all create long, uninterrupted deck areas where thermal movement has nowhere to go. Older homes with additions face the same issue at the junction between the original roof and the new one, where two structures move at different rates. In both cases the expansion joint is the pressure valve, and the cover is what keeps that pressure valve watertight.
Why Large Roofs Move and Why Membranes Split Without Joints
Every roofing material expands when it warms and contracts when it cools, and the effect grows with the length of the run. A dark membrane in summer sun can reach temperatures far above the air, then drop sharply overnight, and the daily cycle repeats for the life of the roof. Without a joint to absorb the movement, the stress concentrates at the weakest point — usually a seam, a corner, or the junction with a wall — and the membrane cracks or pulls away from its fixings.
The damage rarely announces itself. A split seam lets a small amount of water through, the insulation below soaks it up, and the ceiling stain appears months later, far from the actual split, because water travels along the deck. By then the insulation is wet, the deck may be rotting, and the repair is far bigger than the joint would have been. Expansion joints exist to take that stress out of the membrane entirely, and the cover is the part that makes the joint weatherproof.
How Roof Expansion Joint Covers Keep Water Out While the Building Moves
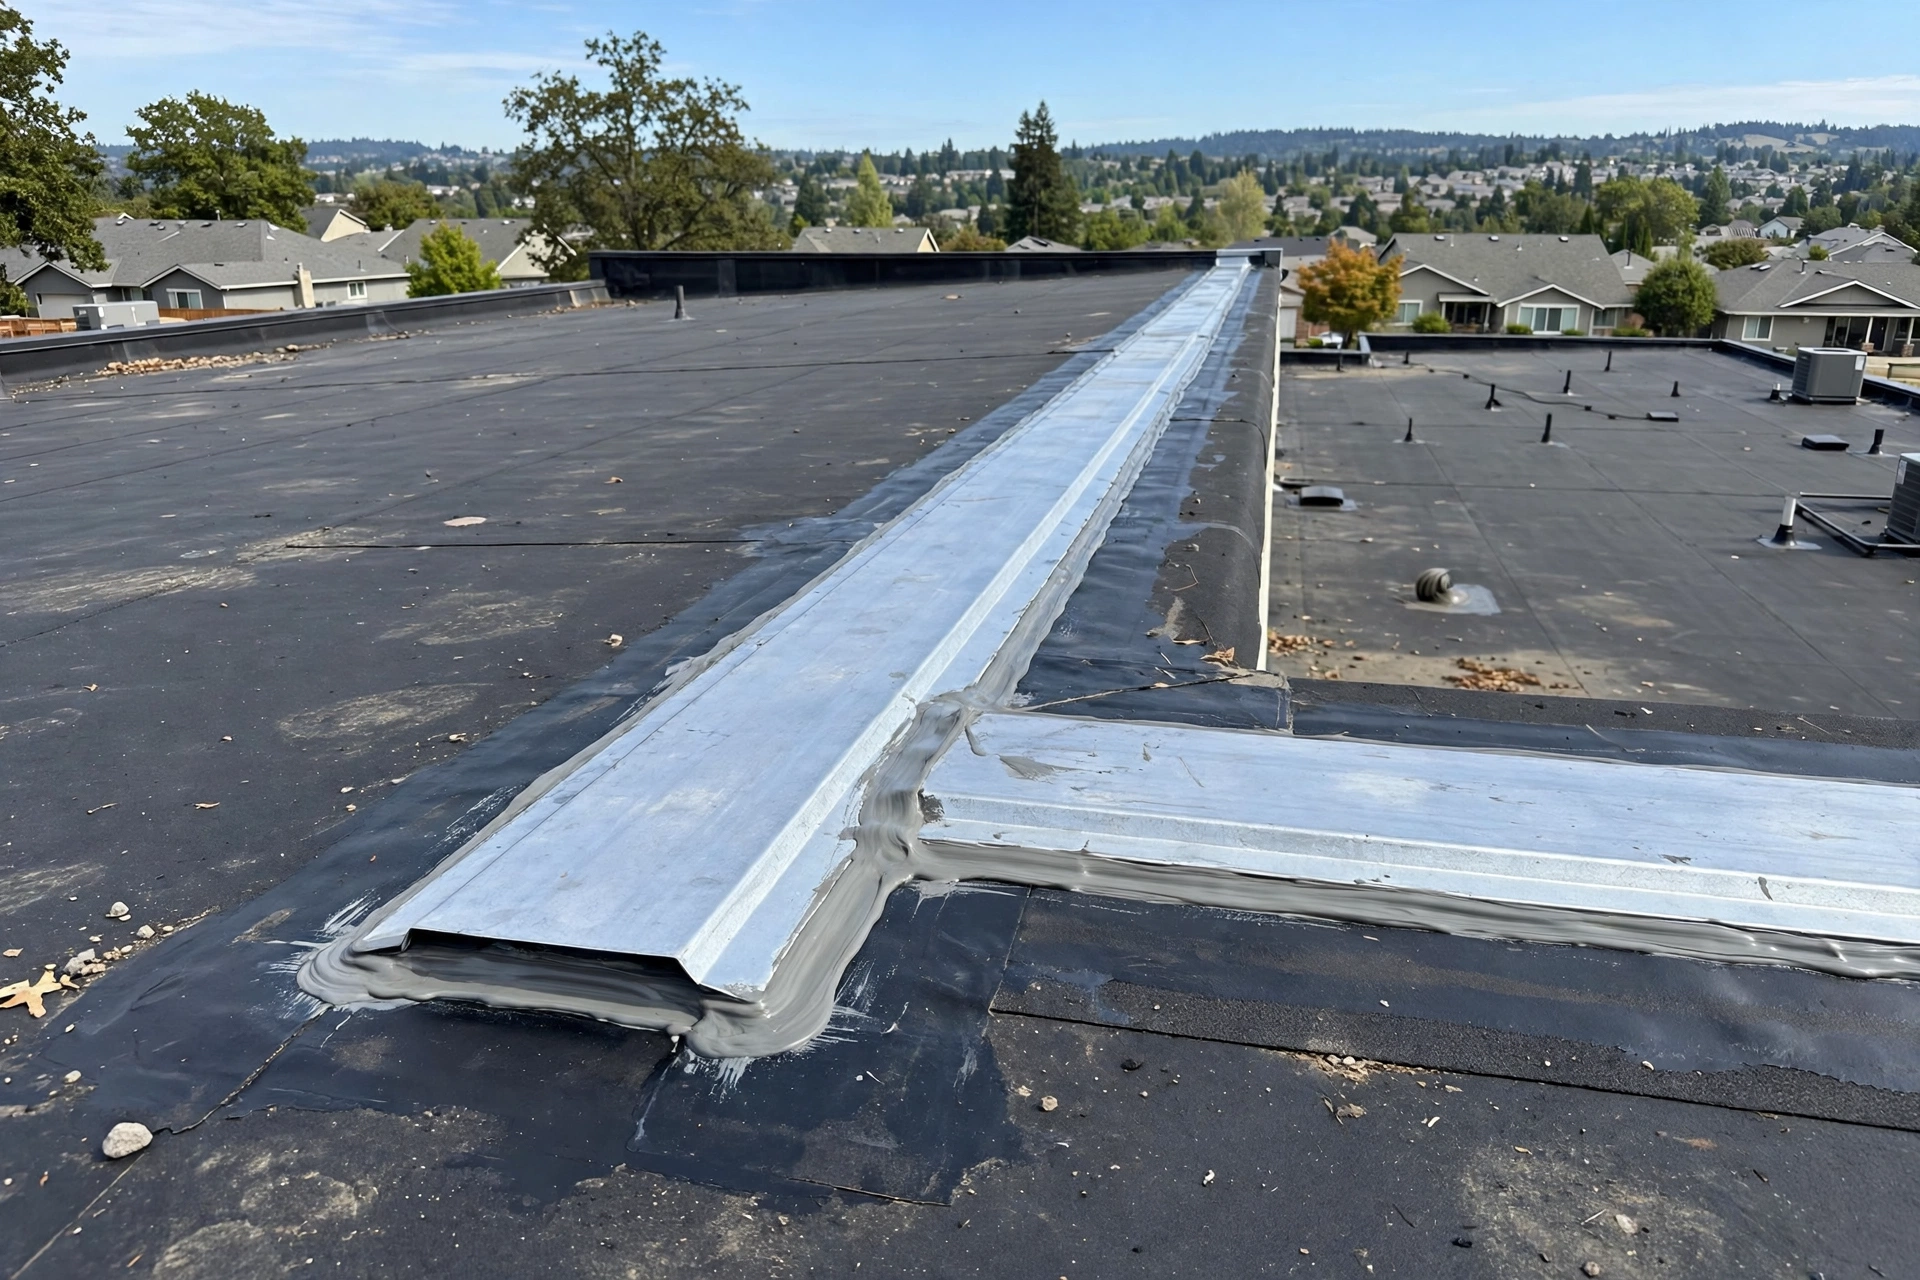
A joint cover works by giving the roof two things at once: a flexible seal and a weather shield. The seal — usually a bellows, a foam core, or an elastomeric band — bridges the gap and stretches or compresses as the two sides move. The shield — a metal cover, a welded membrane flap, or a traffic-grade cap — sits over the seal and sheds rain, snow, and sunlight. Neither part works alone: a seal without a cover degrades in ultraviolet light, and a cover without a seal lets wind-driven rain underneath.
The best covers are raised above the roof surface on curbs, so standing water never sits against the seal. They also allow movement in more than one direction, because a roof does not only expand lengthwise — it also shifts sideways and settles vertically. A cover that only flexes in one plane will tear at the corners, and the tear will become the next leak. When you choose a cover, check the movement rating in every direction, not just the headline number.
Bellows, Foam Seals, and Metal Covers: Matching the Cover to the Roof
There are three broad families of joint cover, and the right one depends on the membrane and the amount of movement. Reinforced neoprene bellows, factory made between two wide metal flanges, are the workhorse for most residential flat roofs; they handle generous movement and weld or adhere neatly to the surrounding membrane. Foam-based systems combine an impregnated foam seal with a waterproof coating in one unit, which cuts installation steps and suits roofs where access is tight. Heavy-duty metal covers with an internal moisture barrier suit roofs that take foot traffic or snow loads.
Compatibility with the membrane matters more than brand. A TPO bellows should be heat-welded to a TPO roof so the joint becomes one continuous surface. An EPDM cover needs an EPDM bellows with the right adhesive, and a PVC roof needs a PVC profile. Mixing systems is how joints fail early: the materials expand at different rates, the bond line stresses, and water finds the seam. Always check the manufacturer’s compatibility chart before ordering.
- Neoprene bellows with metal flanges — the standard choice for most flat residential roofs.
- Foam-core sealed systems — fast to install, good where movement is moderate and access is tight.
- Heavy-duty metal covers — best where the joint takes foot traffic, snow, or maintenance loads.
- Membrane-welded bellows — for TPO, EPDM, or PVC roofs where the cover must become one surface.
- Seismic-rated covers — for large or multi-wing homes where the structure moves in several directions.
If you are unsure which family fits, start with the movement, not the catalogue. Measure the joint gap at its widest and narrowest through the seasons, note the membrane type, and ask the supplier for a system rated for at least that movement plus a margin. A cover rated for less movement than the roof actually makes will fail in its first hot summer, and the failure will look exactly like a roof leak.
Sizing the Gap and the Cover for Your Climate and Roof Span
Expansion joints are not one-size-fits-all. As a rule of thumb, a joint is needed wherever a roof run is long enough for thermal movement to stress the membrane, at every junction between an old structure and a new addition, and wherever the interior heating changes — for example where a heated living space meets an unheated garage. The gap itself is typically at least an inch wide and runs through the whole roof assembly, from the membrane down to the deck.
Climate sets the size. In regions with wide temperature swings between summer and winter, the gap and the cover must handle more movement, and the seal material must stay flexible at the coldest expected temperature. A bellows that turns stiff in a frost will crack when the roof moves, and the crack will open the first time the sun hits it. Ask for the low-temperature rating in writing, and do not accept a cover rated only for mild conditions on a roof that sees real winters.
| Cover family | Movement handled | Best roof type |
|---|---|---|
| Neoprene bellows | High, multi-direction | Most flat roofs |
| Foam-core seal | Moderate | Small to mid-size roofs |
| Heavy-duty metal cover | High, plus traffic | Walked-on or snow-load roofs |
| Membrane-welded bellows | High, single membrane | TPO, EPDM, or PVC roofs |
Installing Covers on TPO, EPDM, and PVC Membranes
Installation starts below the cover, with the joint itself. The gap must be clean, the deck edges sound, and compressible insulation fitted into the opening to stop condensation forming on cold metal. A flexible vapour retarder goes over the insulation, and the cover’s flanges are then fixed to the deck with fasteners matched to the deck material — masonry fixings for concrete, the right screws for timber or steel. Fasteners that do not suit the deck work loose under vibration and let the cover lift.
The membrane connection is where most installations succeed or fail. On a TPO roof, the bellows is heat-welded to the base sheet so the two become one surface; a weld made too cold or too fast will look fine and fail under tension. On EPDM, the correct adhesive and a clean, primed surface are essential. On PVC, the profile is welded the same way. In every case, the cover must extend across the full width of the roof area — a joint that stops short of an edge creates a dead end where water collects and the membrane splits.
Curb Height, Drainage, and the Details That Decide Whether a Joint Leaks
A joint cover that sits flat on the roof is a joint cover that will eventually leak. Raised curbs on both sides lift the seal above standing water, and the top of each curb should be chamfered to the outside so water drains away from the joint opening rather than towards it. The cover itself should shed water to both sides, and the roof drainage should be arranged so that no pond forms against the curb after rain.
Penetrations near the joint deserve the same care. A vent pipe, a skylight curb, or a parapet that meets the joint line is a weak point, and the flashing there must be continuous with the joint cover, not simply butted against it. If the joint crosses a change in roof level, the cover needs a step detail that keeps the seal continuous through the change. These are small details on paper and large leaks in practice.
- Raise both curbs above the roof surface so standing water never touches the seal.
- Chamfer curb tops outward so rain drains away from the joint opening.
- Keep the cover continuous across the full width of the roof, with no dead ends.
- Flash every penetration near the joint as part of the cover, not as an afterthought.
- Check that roof drainage moves water away from the joint after every storm.
Drainage is the detail most often forgotten, because a joint looks watertight on a dry day. The test is a heavy rain: walk the roof afterwards and look for ponding against the curbs, damp lines under the cover edges, and water sitting in the seal channel. Any of those signs means the drainage, not the cover, needs attention first.
Inspecting Joint Covers After Storms and Seasonal Swings
A joint cover is not fit-and-forget. Inspect it at least twice a year — once after winter, once after summer — and after any major storm. Look for the bellows pulling away from its flanges, the metal cover lifting at a corner, sealant cracking along the edges, and fasteners that have backed out. Check the underside from inside the building too: a damp line on the ceiling directly below a joint is the earliest warning that the seal has failed.
Photograph the joint at each inspection and keep the pictures with the roof records. A slow change — a bellows that stretches a little further each year, a cover that sits a little higher on one side — is invisible from one visit to the next but obvious across a series of photographs. Catching that drift early is the difference between a seal replacement and a ceiling rebuild.
When a Joint Cover Needs Replacement Rather Than Repair
Some failures can be patched and some cannot. A small split in a bellows can sometimes be repaired with a compatible patch and sealant, and a lifted fastener can be refixed. But a bellows that has hardened with age, a metal cover that has corroded through, or a seal that has lost its compression will not hold a repair, and patching it only delays the leak. In those cases the whole cover assembly should be replaced, with the membrane connection remade properly.
Replacement is also the moment to fix the original design. If the old cover failed because the curb was too low, raise it. If it failed because the joint stopped short of the roof edge, extend it. If the membrane type has changed since the roof was built, match the new cover to the current membrane. A replacement that repeats the original mistake is money spent twice.
| What you see | Likely cause | Action to take |
|---|---|---|
| Bellows pulling from flange | Movement beyond rating | Replace with higher-rated cover |
| Cracked sealant at edges | Age and UV exposure | Strip and reseal, or replace |
| Damp line below the joint | Seal failure | Inspect and replace the seal |
| Cover lifting at a corner | Loose or wrong fasteners | Refix with deck-matched fasteners |
Roof Expansion Joint Cover Questions Answered for Homeowners
These are the questions homeowners ask most often when a joint cover comes up in a survey or a leak investigation.
How do I know if my roof needs an expansion joint?
Look for long, uninterrupted runs of membrane, junctions between old and new structures, and places where the interior heating changes. If the membrane shows splits, pulled seams, or blisters in a line, the roof is telling you it needs a joint. A roofing surveyor can confirm it in one visit.
Can a joint cover be fitted to an existing roof?
Yes. The membrane is cut along the joint line, the gap is formed and insulated, curbs are built, and the cover is installed and flashed into the existing membrane. It is a bigger job than fitting one during construction, but it is a standard retrofit and far cheaper than repeated leak repairs.
How long does a joint cover last?
A well-chosen and well-installed cover typically lasts as long as the membrane around it, often two decades or more. Its life depends on the seal material, the amount of movement, and whether it is inspected and maintained. Covers that are never inspected fail earlier, usually at the seal.
Will a joint cover stop my roof leaking?
It will stop leaks caused by thermal movement, which are among the most common on large flat roofs. It will not fix leaks from blocked drains, failed flashing elsewhere, or a membrane that has reached the end of its life. A proper survey finds the real cause before any cover is ordered.
Can I walk on a roof expansion joint cover?
Only if the cover is rated for foot traffic. Standard bellows covers are not walkways, and stepping on them can crush the seal. If the joint crosses a maintenance route, specify a heavy-duty metal cover with a traffic-grade finish, and mark the route clearly.
Final Thoughts: A Joint Cover Is Cheaper Than the Ceiling It Protects
A roof expansion joint cover is a small component with an outsized job. It lets a large roof move the way physics demands while keeping water on the outside where it belongs. Chosen to match the membrane, sized for the real movement, raised on proper curbs, and inspected twice a year, it will outlast the roof around it. Skip it, and the membrane will find its own way to move — usually as a split seam, a wet ceiling, and a repair bill many times the cost of the cover.