A wall can look perfect from the living room while it is quietly rotting from the inside. Paint stays clean, the plasterboard feels dry, and nothing smells wrong, yet inside the cavity the insulation is damp, the timber studs are darkening, and mould is spreading across the back of the sheathing.
The direct answer is that walls need a vapour control strategy matched to the climate, not a sheet of plastic installed out of habit. A vapour retarder slows the movement of water vapour through the wall assembly so it cannot reach a cold surface and condense into liquid water inside the cavity. Choose the right class, put it in the right place, and seal the air leaks.
The Hidden Condensation Problem Inside Residential Walls
Water vapour is always moving through a house, from cooking, showering, breathing, and drying laundry, and it moves from areas of high concentration toward areas of low concentration. In winter, that means warm, humid indoor air pushing outward through the walls toward the cold exterior. The trouble starts when it meets a surface inside the wall that is cold enough to reach the dew point, the temperature at which vapour turns back into liquid water.
That liquid water has nowhere to go. It soaks into insulation, which loses much of its thermal performance when wet, and it wets the timber framing and the sheathing, creating the damp, dark conditions that mould and rot need. Because the wetting happens inside a closed cavity, nobody sees it until the damage is advanced. This hidden wetting is called interstitial condensation, and preventing it is the entire purpose of a vapour retarder.
Where Interstitial Condensation Forms and Why It Stays Hidden
The condensing surface is usually the coldest layer in the wall, and in a cold climate that is almost always the exterior sheathing or the outer face of the insulation. Warm indoor air diffuses outward through the wall, cooling as it goes, and the moment its temperature drops to the dew point, water appears. In a typical timber-frame wall without a retarder, that point often sits right against the sheathing, so the sheathing gets wet from the inside while its outer face looks fine.
Several factors decide how bad the problem becomes. High indoor humidity, from poor ventilation or a large household, pushes more vapour into the wall. Cold weather lowers the sheathing temperature and moves the dew point deeper into the assembly. Air leaks make everything worse, because moving air carries far more moisture than slow diffusion, and a single gap around an electrical box can deliver more water into a cavity than the whole wall surface combined.
Vapor Retarder Classes Explained: Class I, II, and III in Plain Terms
Building codes sort vapour retarders into three classes by permeance, measured in perms using the ASTM E96 test method. A lower perm rating means less vapour passes through, so Class I is the most restrictive and Class III the least. The class matters because a wall must slow vapour enough to prevent condensation, while still allowing the assembly to dry when it does get wet. Too little resistance and the wall condenses; too much and it can never dry out.
| Class | Perm rating | Common materials | Typical use |
|---|---|---|---|
| Class I (vapour barrier) | 0.1 perm or less | 6-mil polyethylene, foil, sheet metal | Cold climates, interior side |
| Class II (vapour retarder) | 0.1 to 1.0 perm | Kraft-faced batts, some foam boards | Cold and mixed climates |
| Class III (vapour retarder) | 1.0 to 10 perms | Latex paint on plasterboard | Mixed climates, drying walls |
| Smart retarder | Varies with humidity | Nylon-based membranes | Mixed climates, both drying directions |
The distinction between a barrier and a retarder is more than terminology. A Class I material is effectively a vapour barrier, blocking almost all diffusion, while Class II and III materials are retarders that slow vapour without stopping it entirely. Building Science Corporation recommends avoiding Class I barriers in most wall assemblies, even where codes permit them, because a wall that cannot dry is a wall waiting for a leak to become a disaster.
Which Vapor Retarder Configuration Matches Your Climate Zone
Climate decides the configuration, because it decides which direction the vapour drive runs and for how long. In cold climates, roughly International Residential Code zones 5 through 8, the drive runs outward all winter, and the code generally requires a Class I or Class II retarder on the interior side of the frame wall. That placement puts the retarder on the warm side of the insulation, where it blocks indoor moisture before it can reach the cold sheathing.
In hot and humid climates, zones 1 through 3, the drive reverses: humid outdoor air pushes inward toward the air-conditioned interior. An interior Class I or II retarder in these zones traps inward-driven moisture in the cavity and can cause premature failure of the wall assembly. The code generally requires no interior vapour control there, and building science guidance recommends against low-perm interior layers entirely.
Interior, Exterior, and Mid-Wall Retarder Placement Compared
Interior placement is the traditional approach in cold climates: the retarder sits directly behind the plasterboard, on the warm side of the insulation. It is easy to install during construction, easy to inspect, and effective against outward winter vapour drive. Its weakness is that it also blocks inward drying in summer, so any moisture that enters the wall from outside, through a cladding leak or wind-driven rain, cannot dry toward the interior.
Exterior placement suits cooling-dominated climates, where the warm, humid side is outside for much of the year. A vapour-resistant layer on the exterior side of the insulation keeps outdoor moisture out while the interior remains permeable enough to dry inward. In every case, the retarder must form a continuous layer, with every seam overlapped and sealed and every penetration taped, or vapour will simply go around it.
Smart Vapor Retarders That Change Permeability With the Seasons
A smart vapour retarder, also called a variable-permeability membrane, changes how much vapour it lets through depending on the humidity around it. In dry winter conditions it behaves like a Class II retarder, blocking outward vapour drive when the risk of condensation is highest. In humid summer conditions it opens up, becoming far more permeable, so any moisture in the wall can dry inward. This seasonal behaviour makes smart membranes the most forgiving choice for mixed climates, where the vapour drive reverses through the year.
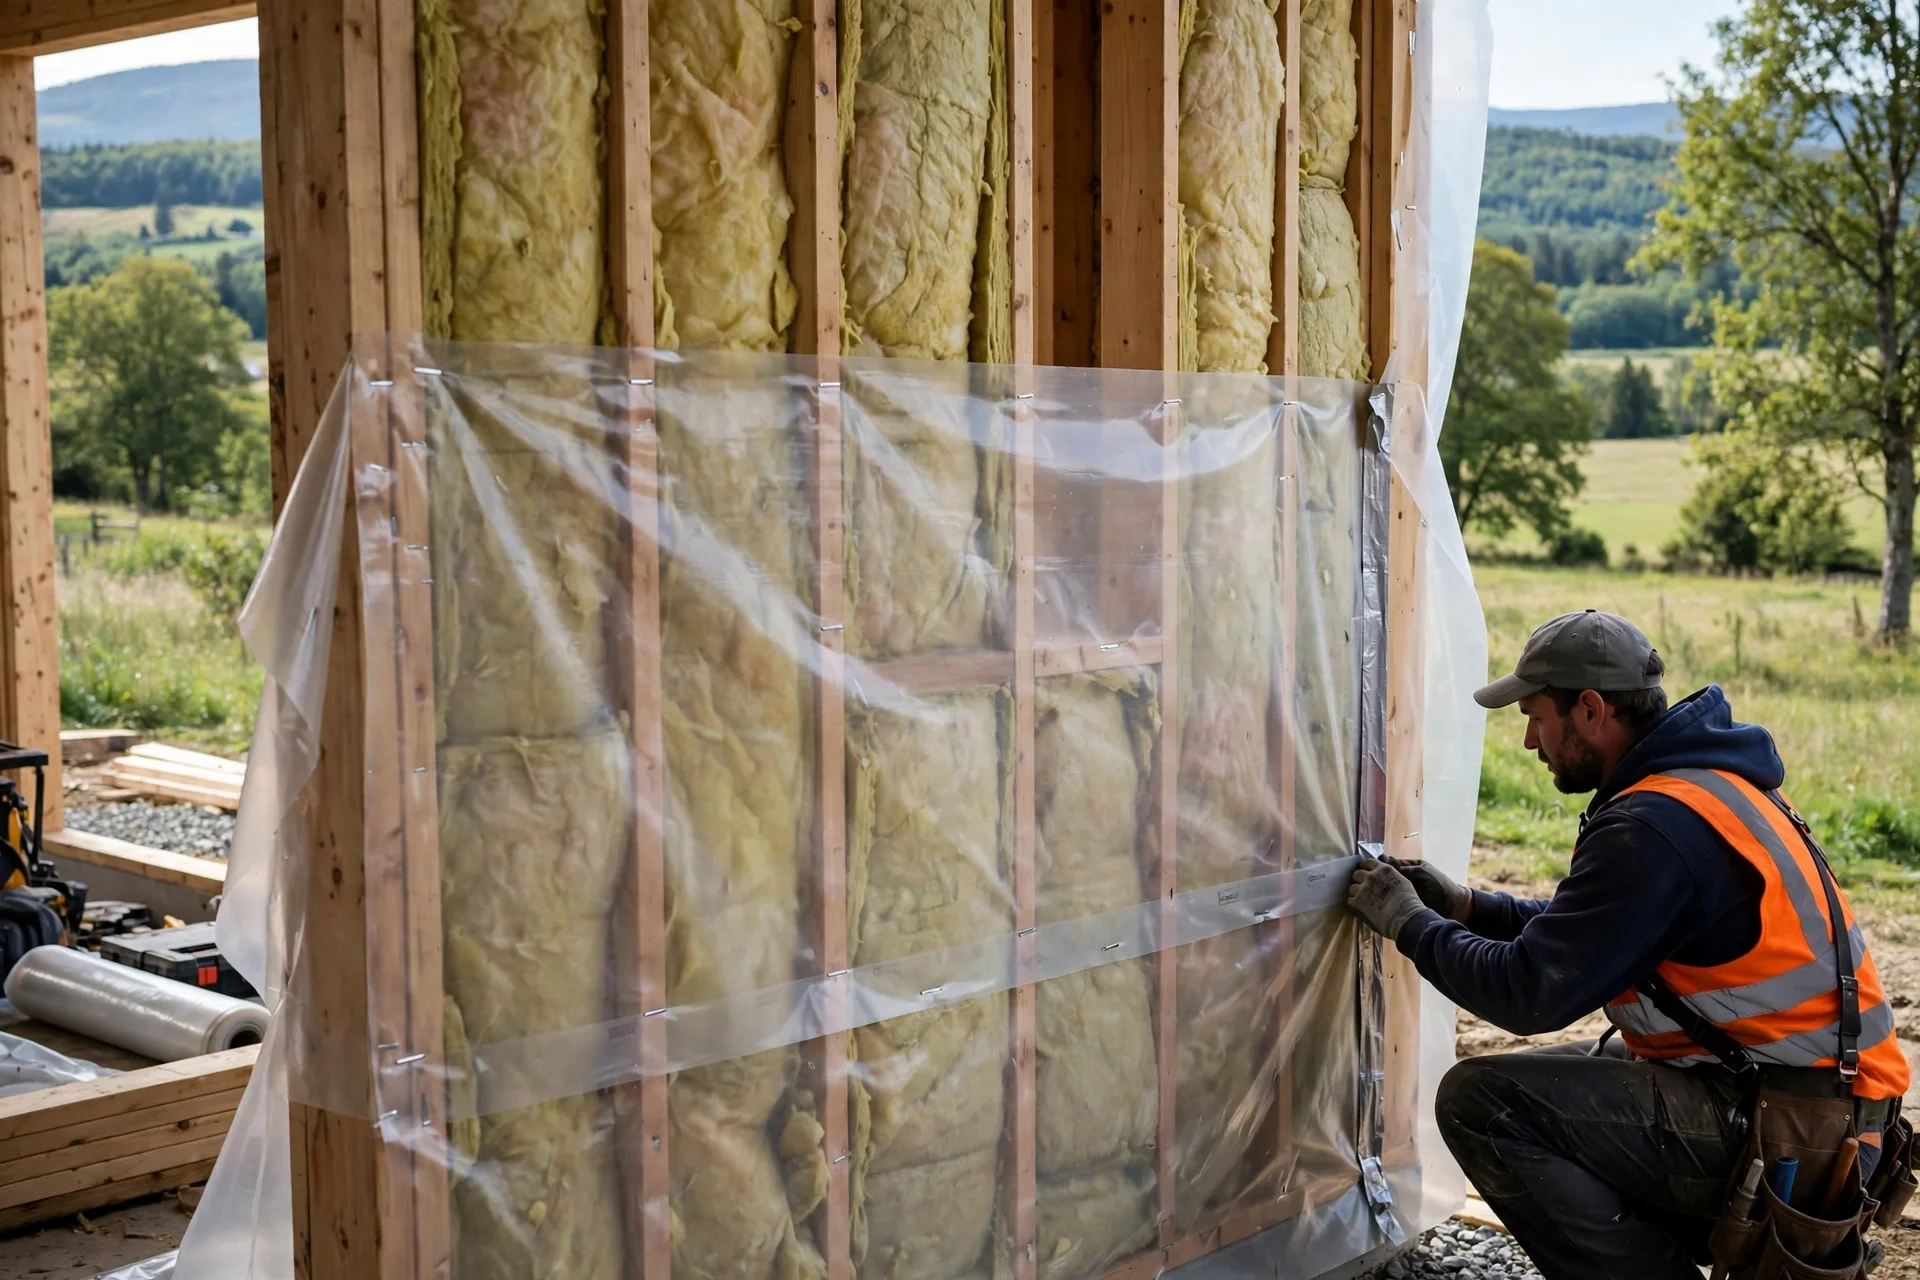
Installation is similar to a standard membrane: the sheets are stapled or taped to the framing, seams are overlapped and sealed, and penetrations are taped. The cost is higher than plain polyethylene, but the performance benefit is real in the climates where they are used, because they protect against winter condensation without trapping summer moisture. Treat it as the vapour control layer in a complete moisture strategy, not as a substitute for one.
Air Sealing First: Why the Air Barrier Matters More Than the Vapor Layer
Here is the fact that surprises most homeowners: air leakage carries far more moisture into a wall cavity than vapour diffusion does. Building Science Corporation notes that air movement through gaps and cracks is responsible for the large majority of moisture transport in most residential assemblies. No vapour retarder, however impermeable, can compensate for a leaky wall.
The practical consequence is that air sealing comes first. Seal the top and bottom plates, the penetrations for wiring and plumbing, the gaps around windows and doors, and the joints between the wall and the ceiling before worrying about which class of retarder to buy. Once the air barrier is continuous, the vapour retarder has a manageable job, and a more permeable Class II or III layer is often enough.
Installing a Vapor Retarder Without Trapping Moisture: Seams, Penetrations, and Drying Paths
A vapour retarder only works as a continuous layer, and continuity is where most installations fail. Sheets must overlap by several inches at every seam, and the overlaps must be sealed with the tape the manufacturer specifies, not with general-purpose tape that dries out and peels. Electrical boxes need gaskets or sealed enclosures, plumbing penetrations need taping or sealant, and the membrane must be sealed to the floor and ceiling plates so vapour cannot slip around the edges.
- Overlap every seam and seal it with manufacturer-approved tape.
- Seal around every electrical box, pipe, and duct penetration.
- Run the membrane continuously across the wall, floor, and ceiling junctions.
- Keep at least one drying path open, inward or outward, so the wall can recover from leaks.
- Never install a second low-perm layer on the opposite side, which creates a double vapour barrier.
The double vapour barrier is the mistake to fear most. A wall with a Class I layer on both the inside and the outside cannot dry in either direction, so any water that gets in, from a leak, a construction accident, or condensation, stays there permanently. Watch for stealth barriers too: vinyl wallpaper, foil-faced insulation, and impermeable exterior finishes can all act as unintended vapour layers.
Vapor Retarder Mistakes That Rot Wall Assemblies From the Inside
Most vapour retarder failures are not product failures but design and installation failures, and they follow a familiar pattern. The first is installing an interior polyethylene sheet in a hot, humid climate, where it traps inward-driven moisture and rots the wall from the inside out. The second is the double vapour barrier described above, which turns a small leak into permanent wetting. The third is treating the retarder as a substitute for air sealing, which leaves the main moisture route wide open.
A fourth mistake is ignoring the drying direction when adding exterior insulation. Thick exterior insulation raises the sheathing temperature above the dew point, which greatly reduces condensation risk, but it also changes the rules: with the sheathing warm, an interior Class I retarder is often unnecessary and can prevent the wall from drying inward during summer. The correct response is to relax the interior retarder to Class II or III, or to omit it where the code allows, and let the exterior insulation do the work.
Residential Wall Vapor Retarder FAQs
Do I need a vapor retarder in climate zone 4?
It depends on the sub-zone and the wall assembly. Zone 4 experiences both heating and cooling seasons, so a Class II or Class III retarder, or a smart membrane, is often the right choice. Check the local code, and consider exterior insulation, which can reduce or remove the need for an interior retarder.
Is plastic sheeting ever the right choice inside a wall?
Yes, in cold climates, zones 5 through 8, where the code often requires a Class I or II retarder on the interior side. Six-mil polyethylene is the common Class I material. It should not be used on the interior in hot, humid climates, or on below-grade walls, where it traps moisture.
Are smart vapor retarders worth the extra cost?
In mixed climates where the vapour drive reverses seasonally, yes. They block winter condensation like a Class II retarder and open up in summer to let the wall dry, which is a combination no fixed-perm material can offer. In a purely cold or purely hot climate, a fixed-class retarder is usually enough.
Does exterior insulation change the vapor retarder rules?
Yes, significantly. Continuous exterior insulation warms the sheathing above the dew point, which reduces condensation risk and often makes an interior retarder unnecessary. In that case, use a Class II or III interior layer, or none where the code allows, so the wall can still dry inward.
Should basement walls have an interior vapor retarder?
Usually not a Class I layer. Below-grade walls receive moisture from the soil, and an impermeable interior sheet traps it in the wall. Most building science guidance favours a permeable interior finish and a proper exterior waterproofing and drainage system instead.
Is latex paint enough of a vapor retarder?
In some cases, yes. Standard latex paint on plasterboard is a Class III retarder, rated between 1 and 10 perms, and it is accepted as the vapour control layer in some climate zones when paired with vented cladding or exterior insulation. It is not enough on its own in a cold climate without those measures.
Final Thoughts: A Vapor Retarder Configuration That Lets Your Walls Dry
A good vapour retarder configuration is not the most impermeable one; it is the one that matches your climate, sits on the right side of the insulation, is sealed continuously, and leaves the wall a way to dry. Seal the air leaks first, choose the class for your zone, consider a smart membrane where the seasons reverse the drive, and never trap a wall between two barriers. Walls built that way stay dry, warm, and sound for decades.